Herman Au Photography

My photo
Welcome to my blog! I'm a professional wedding photographer based in Los Angeles California. Follow my footsteps in turning my life long hobby into a career I love, and check out my latest work, newest products, teasers, and photography tutorials. I shoot in an unobtrusive photojournalistic style with an emphasis on natural and genuine emotions. You can find my portfolio on my website - http://www.hermanau.com.
Showing posts with label photography. Show all posts

Friday, December 04, 2009

On the Move!

We're on the way moving the entire blog over to a new server and migrating over to WordPress. My website http://www.hermanau.com is also being moved over along with a brand new design, new pictures, along with new music from the very talented Mark Barnwell! Hang in there tight! ;-)

Wednesday, October 21, 2009

Out of Office - Hong Kong


I'll be out of office for 2 weeks traveling to Hong Kong. Although I really never liked long flights 'cause I just never sleep well especially on the plane sitting next to strangers, it's about time I pay a visit to my families and spend some quality time with them! I'll be covering a wedding, an engagement session, and also one family portrait session during my stay. Be back soon! ;-)

Tuesday, August 11, 2009

August… Wedding Season!

Boy, it’s HOT in SoCal the past couple of weeks. I’ve been a little overwhelmed lately with all the projects unwrapping in July, August, September.

  • I have a farmer’s (photographer’s) tan… and it’s getting more serious by the day
  • I bought an old Miata to reward myself and to save the earth (some gas), but the convertible driving is making my photographer’s tan even worse
  • This week marks the first time that I’ll be shooting 4 days a week
  • Helen & Alex’s album arrived along with Venetia & Steven’s and Forbeyon delivers once again, they never fail to impress! I am a proud photographer to deliver these quality albums to happy customers
  • I’ve been receiving prints from WHCC several times a week these days, and the UPS man is wondering what’s up with all the odd sized packages *grin*
  • WHCC prints are out of this world… for your reference that’s what I deliver if you order prints from the a la carte menu. Trust me, the print quality never fails to impress.
  • Totally out of context again, but I bought Wii Sports Resort and I’ve been getting e-exercise… the sword fight gave my wife a sore arm, and thanks to the Wii I’m getting some morning exercise every day to kick start the day!
  • A few weeks ago we went Segway Riding with Segwow. It’s F-U-N, and I think once of these days I’ll try to persuade my brides to do a segway engagement session! =)
  • Oh, and congratulations Lisa & Erwin, you guys are totally awesome and your wedding has been a blast to photograph! Keep an eye out for your pictures coming up very soon!

And… New blog design update should be on its way… :-)


Herman Au is a Wedding Photographer located in Los Angeles, California
http://www.hermanau.com

Wednesday, February 25, 2009

Looking for Professionals to Network

I posted something like that on Craigslist but amazingly I never got 1 reply... (usually get 30+ replies for anything I post there) I guess the reason is that I'm not getting married, and I'm not looking to hire somebody, meaning I don't have money to offer nor I have money to spend.

Bummer.

What a shame.

The economy is bad for everybody, and I think I probably picked one of the most challenging times to develop my wedding photography business. Nevertheless, business is growing and is on pace thus far. I actually have business to refer to others, but my book of referrals is short at the moment and I'm literally throwing away business opportunities that somebody else could benefit from. Frankly, I do not want commission, at all. Call me crazy, old school, whatever, but I believe in goodwill. I'm hoping to form a circle of referrals among trusted professionals who can deliver quality work. I want to make my clients happy, and I want to make sure whoever I refer will make me proud and make my clients happier with their service as well.

In short, here's what I'm looking for:
  • Professional Videographer
  • Florist
  • DJ / MC
  • Makeup Artist
  • Professional Decorator
  • Cakery / Baker
  • etc. (this is a short list, but this is not the end of it)
I would prefer somebody who also resides in the Southern California in the general Los Angeles area. So.... drop me a line if you, or have somebody who you think may be interested in networking. :)

Sunday, February 22, 2009

Windows Color Management, Lightroom 2, Windows Pictures and Fax Viewer, and Color Calibration...

Alright, I'll admit I'm not as familiar with color management as I'm supposed to be, and there really isn't a lot of ways to get around it without digging deep into the technical aspects in understanding how it all works. I got myself a new 24" LCD a little while ago, and set the old failing Dell 20" monitor on the side as a secondary monitor. I thought I was done after calibrating the colors on the monitor, but only later found the colors of some of the images didn't come out accurately. I figure I wouldn't be the only one running into this kind of problem, so here I am, sharing my findings.

In my situation, there were lots of things that could contribute to the problem because there were too many ways for adjustments.
  1. Monitor color settings (and ambient light sensor which I turned off 'cause I wanted consistency, not something easy on my eyes)
  2. ATI Catalyst Control Center... yikes, you could change color temperature, hue, saturation, brightness, contrast, and even gamma. Mind you this is done with the software that came with the video card, and this goes on top of native Windows Color Management controls.
  3. Windows Color Management (Control Panel - Display - Settings - Advanced - Color Management for XP, sorry Vista folks, do your own homework)
  4. On top of all that, my ColorVision Spyder2Express that calibrates the monitor.
In order to save you some reading time, I'm skipping all the diagnostics and the story behind how it all went south in the first place. Anyhow, I noticed the colors in LR was entirely off comparing to the same images viewing in Windows Picture and Fax Viewer & Firefox/IE. You'll find plenty of people having similar issues on the Internet, and believe me it's a pain to try to resolve these.

First things first, I reset everything in ATI Catalyst back to default just to avoid confusion. I wanted Catalyst to have no part in dealing with my color calibration. Once I reset everything and made sure the program isn't managing my colors in any way. The moment I clicked OK, the colors of my monitor immediately looked terrible, and I knew that Catalyst did something behind my back...

Next up, I went into the Menu on my HP monitor, and set the colors back to default, restarted my computer after yet another calibration. Colors looked OK, but still off from what I see in Lightroom. Then I noticed the little program that starts up along with Windows that quickly fades during the boot up sequence. I started questioning what that thing does, because I manually assigned the .icm I calibrated in Windows Color Management already. After a little research, I found that Lightroom works differently than the rest of the programs in Windows... according to Adobe:

"Lightroom simplifies color management in your photographic workflow. You don’t need to choose color settings or color profiles until you are ready to output your photos. To take advantage of Lightroom color management, you need to calibrate your computer monitor so that you are viewing accurate color."
So basically, as long as your monitor is calibrated properly, Lightroom will display colors accurately and there are no color management settings in LR to fumble with. According to Adobe, Lightroom assumes sRGB profile for file rendering and Adobe RGB library module previews. I then went into Windows Color Management, and instead of using the customer Spyder2Expess.icm color profile I set previously, I changed it to sRGB Color Space. Then I reset my computer once again, and ran color calibration one last time - whola! Suddenly the colors of the 2 programs are matching!

That's it?

Nope...

Apparently Windows Color Management assigns an .icm profile to the display monitor, but that does not assure the programs that are shipped with Windows XP or your image display program like Windows Picture & Fax Viewer would play nice with color profile. Why? For starters when you have Adobe Lightroom which plays nice with your calibrated monitor and monitor color profile and displays things properly simply will not match the colors you see with the same image with Internet Explorer or Windows Picture & Fax Viewer 'cause neither programs recognize embedded ICC profiles. It would automatically assume the default color profile - your calibrated monitor profile to display the image you're trying to view. If you're trying to view any regular sRGB or aRGB image with that, yikes... it will look all messed up just like this:


icm_test1 (by hermanau)

So which one is "correct"?? It's actually the one on the left which looks whacky greenish. Yep, that's right... I took the screen shot with the windows printscreen feature, and this tells you that Windows "thinks" I'm seeing correctly as the one on the right, but in reality I see something VERY RED on my calibrated monitor. Anyway, the important thing to notice here is that I'm viewing a correct image on the left, while Windows is displaying wrong on the right; but when I printscreen, Windows returns the "correct" colors on the right, while the left now becomes wrong in the other direction - green.

To confuse (clarify) you further... here's the original image exported from LR to sRGB displaying properly: *note that you may not even see a difference if you don't have a calibrated monitor*

_DSC0661srgb (by hermanau)

If I view this image in Safari for Windows or Lightroom which reads embedded color profiles, they display properly on my calibrated monitor. If I view this same image with Internet Explorer however, it will look WAY OFF.

I think I lost almost everybody already, but if you're still reading, congratulations... here's the lesson learned:

  1. The majority of the monitors out there are NOT calibrated.
  2. The majority of the images on the Internet are untagged sRGB, which should display rather accurately if you export your images in sRGB.
  3. Color Calibration is NOT for everyone, especially if you do wish to give yourself a headache unless you absolutely have to. It is mostly important for photographers, graphic designers, or the likes to ensure their images come out properly at printing.
  4. If you calibrated your monitor, and you notice Windows Pictures and Fax Viewer showing different colors to Adobe Photoshop, Adobe Lightroom, Safari, or Mozilla Firefox running with proper Color Management, read this straight: it is normal. You just have to deal with it and understand the limitations of those programs and learn that they're not to be trusted in terms of color.
  5. Color Management is not fun at all... again, if you don't have to deal with it, even if you have too much money to spare on that pretty Monitor Calibration tool, make sure you are ready to tackle a huge confusion before you buy that cool gadget for pros.
  6. If you don't fall into the pros group who absolutely need color manangment, take my advice - don't play with the color settings on your monitor! I know your new expensive monitor has many pretty controls that let you play with them, but again, do NOT play with them. Windows will not know your monitor settings are off, sRGB will be off, even Lightroom wouldn't know it's displaying on your whacky monitor and all your pictures will come out whacky on everybody else's monitors. Just don't touch them, stick with sRGB, and be happy that you have one less trouble in your life.
That's it folks, I hope I have scared off enough folks and managed to explain enough details and shared enough experience with those who are in need. Until next time...

Reference: http://www.gballard.net/photoshop/srgb_wide_gamut.html
Tuesday, January 27, 2009

New Website launched :-)

website_screenshot (by hermanau)

I've been trying to get organized the past few months. Knowing myself, sometimes my thoughts do scatter and at times I have trouble finishing up any major projects by myself. I've been writing down my open projects on a to-do list on my iphone, which I use every day to remind myself what I should be doing. It's working alright thus far, and I finally managed to get my new business card designed and printed with the help of Alvin. Then today, I finally decided to launch my new website in place of that old one I put together rather hastily. With a brand new logo, website, and business card, I'm hoping I can achieve new heights with my photography business as I continue to improve. :-)

3178259143_ffaf384c70_o

Next on my list, I decided to completely redo my album design. After carefully reviewing the original design and the pricing, there are just too many changes I wanted to make and it would be much easier for me to do it all from scratch. Good news for those who have booked me for 2009, because they're getting free upgrades on their premium leather albums going form 8x8" to 10x10" for free. ;)

3178259027_6b3c023c18_o

Then I'll be making several large prints and working for display, and that should get me better prepared when I'm hit with the next opportunity for bridal shows or other promotions. I haven't done ANY promotional work in 2008, and I should consider myself lucky to somehow managed to get all those jobs that I did.

Oh, and Happy Chinese New Year for those who celebrate it. =)

Friday, January 23, 2009

2009

Well, there are several things planned in January 2009 that's pretty much on schedule at this point. First of all, I have a brand new re-designed business card with a new logo thanks to Alvin's generous help. The printing went pretty smoothly this time and I'm hoping this will help me define the identity of my photography business.

DSC_6371

Then, next in line is a brand new flash website that I've been working on the past month or so. I found a musician who generously granted me to use his work as the background music, and everything including the portfolio and sample galleries are all going to be much easier for me to update. Everything is slowly taking shape and falling into the right places, and I'm hoping I get the keywords and site description right this time. I'm really not the business oriented type, and I haven't really done any forms of advertising so far. However, I'm really hoping I get it right this time, and make a good first impression for those who do drop by my site in the very near future. I'm a little tired of my old cards and site that kind of present my work in a somewhat negative way... :-)

Stay tuned... I'll be back soon, I promise!

Tuesday, October 07, 2008

Session for the Little One: Isaac

Sorry folks I'm still here, just really getting behind updating my website and my blog lately. A lot has happened lately and I've been busy working on photos rather than my sites. I've also been working with a couple of vendors trying to narrow down which one to use in producing the album for the ONE package. Before I get sidetracked again, here are the pictures I took of Isaac, Peter, and Beverly for their baby session. It's not something that I normally do, but I sure did enjoy it and had tons of fun... and neck pain to go with it after. =)

Isaac (by hermanau)

Isaac (by hermanau)

Isaac (by hermanau)

Isaac (by hermanau)

Isaac (by hermanau)

Isaac (by hermanau)

Isaac (by hermanau)

Isaac (by hermanau)

Isaac (by hermanau)

Isaac (by hermanau)

Isaac (by hermanau)

Isaac (by hermanau)


Here's a link to a quick slideshow also. :)

Monday, September 01, 2008

San Dimas Farmer's Market

Several weeks ago I received an inquiry from Mauricio who's behind the NPO that organizes the San Dimas Farmer's Market asking if I would help them out taking some pictures. I thought to myself, it's about time I give back a little to the community... and I have always wanted to take a look there anyway. :) Last week I went there was pleasantly surprised by the friendliness of everybody, and had a blast just being there myself and being able to shoot. I probably should have been there earlier if I knew that was so much fun. I'm sure I'll go back there again another time, probably with some friends and pick up some more local grown veggies and shoot the rest of the cool happening that I missed last time.

Here's a short clip of a summary of the pictures, followed by some of the shots I took there. Enjoy!


DSC_6481 (by hermanau)

DSC_6482 (by hermanau)

DSC_6485 (by hermanau)

DSC_6498 (by hermanau)

DSC_6500 (by hermanau)

DSC_6505 (by hermanau)

_DSC7676 (by hermanau)

DSC_6509 (by hermanau)

DSC_6514 (by hermanau)

DSC_6516 (by hermanau)

DSC_6524 (by hermanau)

_DSC7684 (by hermanau)

DSC_6535 (by hermanau)

DSC_6539 (by hermanau)

DSC_6548 (by hermanau)

_DSC7706 (by hermanau)

_DSC7706 (by hermanau)

DSC_6561 (by hermanau)

Monday, August 18, 2008

Delia Photoshoot

We've been planning on this shoot for several weeks already... with limited budget and experience and a lot of uncertainties, we went ahead with this photoshoot last Saturday. It took a little while til we all warmed up and had the lights, reflectors, and everything else figured out properly to get the effects I was hoping for, but I think the whole experience was well worth the effort. We only used a simple setup mainly using the AB1600 as the key light varying its position. I also added a hair light with an SB800 behind the model up high, and on some shots I added a catch light laying on the floor. I had a large reflector on the opposite side as fill, and I also varied the position and angle of it on some shots.

Next time I think I'll set up my D200 in time lapse mode... but anyway, this video was taken somewhat randomly with a remote. It does give you an idea how the whole thing was done. Hope you'll enjoy it as much as I do. :)


Big thanks for Delia modeling for us and really appreciate Bernard providing his garage and the Alienbees strobe making this possible.

_DSC_6303 copy (by hermanau)

_DSC_6295 copy (by hermanau)

_DSC_6274 copy2 (by hermanau)


_DSC_6339 copy (by hermanau)

_DSC_6107_001 copy (by hermanau)

_DSC_6150 copy (by hermanau)

Wednesday, July 23, 2008

Light

I've been attending a lighting class at Tri-Community Photography School taught by Don Gale the past couple of months. I chose that class primarily because I wanted to catch up on one of the most important aspects of photography, light.

Just before I take you completely off track as usual, there are a couple of books that I found particularly helpful while we're on the subject of light.

Existing Light Techniques for Wedding and Portrait Photography by Bill Hurter
. It's a relatively short book with some excellent images that would wow you normally, and he explains the technique used in there to make the image possible. Although he doesn't take you by your hand and teach you step by step, the author has done a good job explaining the approach and setup, and most importantly talking about how to use natural light and even mixing different lighting. There's also a good variety of techniques covered in the book which really makes it worthwhile.

The second one I recommend is The Complete Guide to Light and Lighting in Digital Photography by Michael Freeman. This is a great book if you're into photography but don't understand enough about light. Michael Freeman dissects light into many different categories and examines each of them individually. He also covers a great deal of lighting equipment from portable shoe-mount flash to heavy studio lighting. Towards the back of the book contains variations of some simple lighting setup which allows you to compare them side by side to see from the subtle differences to dramatic changes of results by simple adjustments to the lights.

Lenses

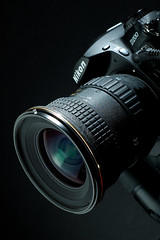
I was cleaning up my guest room the other day which houses my camera equipment and saw a stream of beautiful sunlight shining through the window. I wanted to play with the light a little and so I popped open my ebay light tent and put my lenses inside to see how it compares to using my usual flash setup.

Gosh, the light is so much softer and it's unbelievably easy to shoot 'cause the box pretty much is completely lit by natural light, and it's constant lighting that the camera can meter... Notice the shadow side of the lenses and even towards the bottom are also lit very well to show enough details. I also noticed the slightly pinkish tent looks almost perfectly white under natural light. I normally have to clean up the pinkish white background after I shoot with my flash.

That little experiment really got me thinking about learning how to better work with natural light instead of using my flash all the time. Comparing the quality of light, it's really hard to beat early morning window light if you're looking for diffused directional light. It's got a totally different quality to flash light, and it takes a totally different approach to harness. This is where a large white/gold/silver reflector or a diffusion panel would come in handy. It allows you to alter the direction of light, the color temperature of the light, and by varying the distance and angle, you can even change the intensiveness of the light. Not bad considering we're talking about 30 bucks off ebay, and the rest is free! (last time I checked the government has not began taxing us on sunlight yet)

DSC_5104 (by hermanau)

Here, I took a few quick shots to show what a diffusion panel makes. This image above was taken in the morning in a small room. The only light source is the window light, and I placed the subject on a small table right next to the window. The direction of the window light is great, but still it is direct sunlight on a clear day and it looks harsh. Look closer at the shadows and examine the edge of it, and now compare the next image.

DSC_5098 (by hermanau)

Big difference huh? Pay close attention to the shape of the shadow and see how much more diffused it looks. The light looks a lot softer, and you can hardly see the frame of the window anymore. The light source never changed, and the only difference here is a cheap white translucent diffusion panel placed over the window. The result is a much more pleasing image.

DSC_5097 (by hermanau)

This would be extremely useful during a wedding shoot when you come across beautiful window light, but blinds are in place of sheer curtains. If I had a second set of hands or somebody helping me hold a second reflector panel to act as a fill light, the results would be much more pleasing instead of having the subject sitting right next to the window to let the sunlight cast shadows over the chin and nose bridge.

Too bad I can't exactly fit this huge panel into my camera bag... :) But then again, I'm sure this will open up entirely new opportunities in the quest to harness our free light source.

Next up, review on BlackRapid R-Strap.

Tuesday, May 27, 2008

On Equipment Management during a Wedding Job

It's been a while since I actually sat down in front of my computer not editing pictures or emailing clients. Lately I've been shooting weddings after weddings, and even a Gown Trashing session with a couple. I've been updating my equipment rather frequently to adapt to the needs. The old Sigma 28-70mm F/2.8 is replaced by a wider Tokina 16-50mm F/2.8 for indoors as my bread & butter lens. I picked up a Nikon D300 as my primary body and moved the D200 down as a backup body which is giving me much more freedom with the much improved ISO performance. I picked up a Demb Flip-It! flash diffuser also for more options for flash bounce. And then there are lots of other little things like compact flash memory, memory card case, Rapid RStrap, etc etc...

I still remember when I got all the excitement before every time I picked up new gears (toys?), and I couldn't get my hands off of them and would go nuts shooting everything I find. I'm shooting less on random subjects lately, and started catching up on my readings mostly on books that I've purchased previously and some photography magazines for inspirations. I don't exactly get the excitement with my new equipment, but rather want to get the most out of them and get over the hump of familiarizing with them as soon as possible.

Last Sunday was my first wedding shoot with the D300 and also with the Demb diffuser. I made several adjustments in my gears again, and I think I'm getting closer to the ideal work flow as I progress.
  • Morning Indoors:
    • Carry: D300, 16-50mm F/2.8, SB-800 flash
    • Bag: SB-600 flash, 50mm F/1.8, 105mm macro
    • change flash batteries at the end regardless
  • Church / Ceremony:
    • Carry: D300 with 80-200mm F/2.8, D200 with 16-50mm F/2.8 and SB-800 flash
    • Bag: SB-600 flash, extra batteries
    • change flash batteries at the end regardless
  • Banquet:
    • Carry: D300 with 16-50mm F/2.8, SB-800 flash
    • Bag: 12-24mm F/4, 50mm F/1.8, SB-600 flash
With a plan properly laid out, this should help me better arrange my gears in my bag(s) and reduce the chance that I'm carrying the wrong gears at the wrong time and relieve some stress off my neck & shoulders. It's really no fun to carry an extra 5lbs for several hours for nothing... which kept happening to me and I'm the only one to be blamed. :)

I also find myself in desperate need of getting a proper business card, which kept getting delayed... along with the website design which is long past due. It's no fun handing out my temporary business cards anymore *chuckle*

I've also been working on my price list, check list on tips/guidlines for B&G, and a checklist for myself which I think would really be helpful if you're forgetful like me... :) It isn't like the majority of the check lists you'll find off the Internet, but a very stripped down version of the small details that's easy to forget. I don't want to get the shooting sequence to a recipe and follow it exactly every time. I feel that every wedding is different and should be personal, and as long as you follow the general guidelines, you should really let your creativity lead you.

Anyway, enough of my babbling for tonight... :)

Tuesday, April 15, 2008

Lighting for Food Photography

I've been trying to improve the lighting on my food photography for a while. A big part of what I enjoy about photography is the reverse engineering on the shots I enjoy, and that includes both technical and artistic aspects. In this shot particularly, most of the hurdle for me was the lighting setup and the fine adjustment in post-processing that added the final touch that made it look natural.

Two Nikon Speedlights (flash) were used in this shot:
The first is ahead of the camera positioned slightly higher pointing down shooting through a small softbox; and the second on the right of the camera reflecting from a silver umbrella. A white reflector was used on the opposite side to fill some of the shadows. I'm sure this can be further improved with a little more fill light for the front of the cupcakes. I'll probably try another reflector above the camera next time and see if that helps. I guess I found more things to buy... again... reflector(s), reflector holder, light meter... argh this nonstop purchase list never seems to end. :) At this rate, I'll never be able to save enough photography budget to get a D300 I suppose.