Herman Au Photography

My photo
Welcome to my blog! I'm a professional wedding photographer based in Los Angeles California. Follow my footsteps in turning my life long hobby into a career I love, and check out my latest work, newest products, teasers, and photography tutorials. I shoot in an unobtrusive photojournalistic style with an emphasis on natural and genuine emotions. You can find my portfolio on my website - http://www.hermanau.com.

Sunday, November 25, 2007

Flickr Explore Tips and Tricks

I joined flickr for about half a year, and have 57 pictures on Explore (71 as of Mar'08). I once strategically made a few of mine to show on Explore... although I can't force them to get up there, I do have a pretty good idea how it works. Here are some pointers and cruel truth about it:

#1. Faves, Comments, and Views are basically the things that account for the positive score (interestingness) that count towards Explore.

#2. Adding to groups account for negative points (interestingness penalty) .

#3. Source of views/comments/faves matter; and the person who views/comments/faves your picture also matters. e.g. A newbie who just signed up today without an icon and has 0 pictures in the stream is worth less than hermanau for example, giving you a fave. Also, getting 1,000 views from outside links probably give you different scoring as well.

#4. Repeated comments from the same person are not worth as much as comments from different sources, if not actually penalizing the shot itself. Think about it, some people use certain pictures to carry on discussions. Explore has to screen those out...

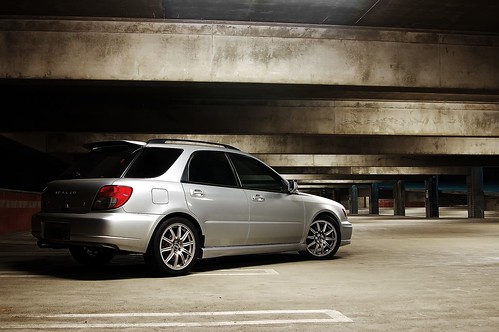
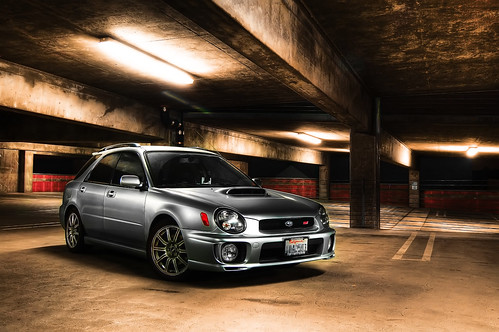
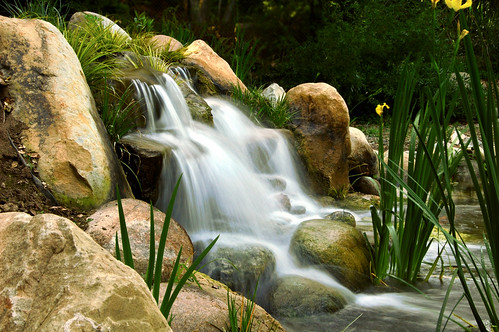
#5. Joining many groups, and leaving the groups and rejoining tactics simply don't work... trust me it doesn't. This shot on the right was submitted to too many groups after Explore dropped it the first time, and it never made its way back regardless of how many views/comments/faves I got afterwards. It just lost too much grounds to be covered.
*note* months after I wrote this post, the picture on the right received a much needed boost of visit, and I finally regained enough to make its mark on Explore, proofing my theories are quite accurate.


Now that pretty much sums up the basics of the scoring system... note that if you place your shot in too many groups to begin with, your shot better gain a huge flow of traffic and faves, or else it will never cover the lost grounds and make its way up to Explore. How do you get the views/faves without adding to too many groups you say? Yea that's what makes it difficult... I'll sum up a few points here:

A). Sex sells. It's universal... a picture of a very pretty person will definitely have it easier than a picture of your living room. But beware, R rated pictures that are marked would probably be removed, or you may be penalized...

B). If you're a female with a pretty picture as your icon, congratulations... you'll have an easier time than me, or Joe next door... :) Flickr is pretty much web 2.0... and it's a social network. Like I mentioned above, since views and faves matter, you might notice that certain types of people get it easier than others due to obvious reasons.

C). Your subject matters. Some subjects have it easy because they draw people to click on the thumbnail to view a larger size. Our curiosity always gets us, because a bigger picture and the full details are just a click away.

D). Pictures with really eye popping effects or stunning visuals or jaw dropping elements always work. People would also generally fave those shots because they'll want to be reminded of the originality or the technique. Be generous and share the details behind your shots, because it helps others and also provide your viewers a platform to discuss, resulting in comments.

E). Get your shot technically right - Have it properly exposed, color balanced, focused correctly, etc. I don't think we need to go too far on this topic, I'm sure you all know this is important.

F). Be truthful to yourself. If your shots really aren't as good as those up there on Explore 500, maybe you need to improve before trying to push them up on the list.

G). Build up your contacts and social network, because those who like you or appreciate your shots would usually be kind enough and come back and view your latest work, and possibly earn your more views/comments/faves.

H). Yes, there appears to be a time zone on Explore. Afterall flickr is a worldwide network. From what I've heard, it is based on Pacific time zone, but I find flickr updates many times every day and so it probably doesn't matter when you submit your shot really.

I). Don't underestimate your tags, descriptions, and titles. They are the fields that allow your shots to be found when people use the search feature. That's one good source of allowing people to find your shots among thousands and thousands of pictures uploaded to flickr every second. Also, keep your pictures well organized, and navigation-friendly.

Finally, let me add one last thing to wrap this up... Flickr is about Photography, please be kindly reminded of that. Although I know you all want your shots to be listed on Explore or gain some publicity, it's also very important that Explore maintains the level of quality. So far I think it's got a very good algorithm in picking interesting shots. If you really want to make your way there, here's basically what you should do:

Improve your photography; learn how to positively critique; learn how to LISTEN to comments and critiques you receive; learn to appreciate great work of art; generously, nicely, kindly, and genuinely comment on others' work; be original, work hard, and enjoy the process.

Tuesday, October 02, 2007

Wine Bottle


Wine Bottle, originally uploaded by hermanau.

Thanks to Strobist.com, Flickr, and web 2.0 helping me solve a lot of reverse engineering puzzles in my head. With the limited resources, some very wacky setup, and the recent addition of some cheap umbrellas, I was able to produce the type of product shots I've long wanted to attempt. This shot of wine bottle is one of the examples that shows you everybody can do it... well, almost. :)

This is shot with my Nikon D200 with Nikkor 50mm F/1.8D hand held @ F/9.5 1/90sec. It's lit by 2 SB600 speelights - one below the bottle that sits atop of a piece of transparent Plexiglas, and a second one left of the camera shooting through an white umbrella. Background is simply a piece of poster board I bought from Office Depot. A picture speaks a thousand words, see the setup below.

Wine Bottle setup (by You)


Stay tuned - I'll demonstrate how I did some of my black background images next. :)

Tuesday, September 18, 2007

Thanks Ken Rockwell, but...

A lot of you who are into photography would have stumbled across Ken Rockwell's website one way or another. Before I begin, I should really thank him for contributing so much free and useful information to the Internet. His site is undoubtedly generating lots of traffic and probably earning quite a bit of advertisement dollars, and I really think he deserves the recognition and credit. It's one of the websites I always check to see "what Ken thinks" before making my purchasing decisions. It's especially a wonderful site if you're searching for old vs new Nikon equipment.

Alright, enough of giving him all the credits, let's go back to why I'm writing this. I'm writing this to contribute my share back to the online photography community to warn you guys to watch out for his website, and especially what he directs you to believe is the "fact". Ken mixes in a fair share of great information along with his very personal opinions when it comes to comparisons. That's what really makes him deadly. If you're simply starting out in photography and choosing equipment, and you stumble across his website and start learning everything there without a clear head with an open mind when you find other relative information, you'll simply start thinking "the Ken Rockwell way".

"What's wrong with that?", you might ask. I'll give you a quick example here.

On his Nikon SB-600 versus SB-800 Comparison page, you will find plenty of information that you will want to know about the differences between the two. However, if you read it with a clear head, you'll soon notice he's strongly biased against the 800 and presents to you almost no pros for choosing that over the 600. Pay attention to lines like these -

Illuminated LCD
Dedicated icons and 7 segment numbers: bold, easy to read
Coarse generic dot-matrix, harder to read
I don't know what your eyes are made of, Ken... but we don't really live in that 7 segment LCD calculator display age anymore. I really don't know why a dot-matrix LCD screen is harder to read for YOUR EYES.

Idiotic repeating strobe mode
no
Yes
What do you mean by IDIOTIC REPEATING STROBE MODE? For those who are interested in experimenting with flash photography, like capturing water drop sequence, freezing athletic motion, and all kinds of eye opening effects, the SB-600 simply lacks that capability. What you don't use doesn't mean it's "IDIOTIC"


14.) Wedding photographers carry fat external batteries for fast recycling and tons of shots. The SB-800 has a socket for this. The SB-800 even has a bizarre external single AA holder which lets you use odd sets of 5-AA cells for somewhat faster recycling compared to just using the 4 internal cells (It seems weird to me: my sets and charger come in 4s, not 5s.) Other companies like Quantum make big external batteries that plug right into the SB800 while the SB600 has no such connection. In the old days we just rigged up our own connections to flashes, usually with wooden dowels the size of AA batteries and thumb tacks, and used a 6V gel-cell around our waists. Personally I just swap alternating sets of Ni-MH AAs and I'm happy.

Ken, wedding photographers carry the external batteries for fast recycling time because they need the luxury for ultra fast recharge time so they minimize the chances that they miss THE shot. Yes, you can swap your Ni-MH AAs and be happy, but for those who need the flash and they need it NOW, they need that SB-800 and that big fat battery around the waist you describe.

Yes, his entire website is filled with great information about equipment, but also a whole bunch of very personal opinions based on his photographic style. As much as I enjoy reading his site, and as much as I look up to what Ken has to say about something, we should all proceed with caution and read his site with a very, very open mind. Be sure to watch out for those opinionated lines and see what others have to say especially when money in your wallet is on the line.

Thursday, August 23, 2007

They're here! Nikon D3 and D300

It wasn't long ago when I upgraded my D70 to D200... and today Nikon finally released their top secret projects of the D300 and professional D3 to compete with Canon. I browsed the spec sheet briefly and I'm still digesting the information... here's the link to the 2 cameras for your information. :)

It appears that Nikon finally delivered their flavor of full frame sensor, and this new sensor design provides unprecedented noise control in Nikon DSLR history that may allow them to rival with Canon. This new FX format also carries on the Nikon tradition of compatibility to allow the use of DX lens with automatic masking. Both cameras utilizes a new 14bit EXPEED sensor that should boost tonal range. Both cameras offer the new 51-point AF system, and also a self sensor cleaning feature. They also seem to have put in more effort in defending the cameras against dust and moisture. The detachable caps seem to be improved... (yay no more losing plastic caps). Both cameras have 3" LCD monitors with wide viewing angle, and hopefully their new EN-EL4a would address the battery life issue.

At a first glance, the 2 cameras appear to be matching up quite well against the Canon 40D and 1D-MkIII. Now they're on even ground to compete... it will be interesting to see the upcoming image comparison. :)

More on this later.

Wednesday, July 25, 2007

Goodbye my Nikon D70

"Thank you"

My Nikon D70 really took me to a different level moving up from my Nikon D50 with a lot more features that are missing. For that kind of money, it's an absolutely perfect camera for anybody to move up from point & shoot to really get a taste of DSLR photography. I had a talk with my die-hard Canon friend comparing features of the few cameras we've had our hands on, and I'm sure he'll agree if I say that Nikon really packed a lot more features and value into this camera than anything comparable with the same price tag with the name Canon on it. Just by holding the camera in your hand and you'll feel the difference, much like feeling BMW plastic comparing to Honda Civic plastic.

Why am I getting rid of it? It's sad but 6.1 megapixel is simply not enough if I start printing or selling my images. It's really unfortunate that it boils down to this, but it's the sad truth that the D70 is made for the consumers, not prosumers, nor the pros. If I were ever to dip my foot into that area, it simply isn't good enough.

Why not sell the D50? The D50 is a newer camera, and I find it generally much easier to capture good images with it than the D70. Don't get me wrong. Both cameras are neck to neck in terms of image quality, and the D70 gives you a lot more bells and whistles and extend your capabilities to create that "better" you'll struggle with the D50. However, the D50 is my choice to serve as a second camera, or as a backup camera. On top of all that, my wife bought the D50 to me as a gift... :-)

If you want to seize this opportunity and pick up my D70, it's on ebay for 7 days starting today 7/25/07. Here's the link to the auction.

Goodbye D70! You served me well, and It's really sad to see you go. I hope your new owner takes great care of you!

Monday, July 16, 2007

My first real Photo Shoot - Audi TT


Moro Blue Audi TT Coupe, originally uploaded by hermanau.

The pressure was on, and I was seriously getting quite nervous. I found a few guys over the Internet willing to show up with their rides for a photo shoot last week at my "private studio". I had Bernard with me that night who really relieved me from quite a bit of stress and pressure helping out and shooting as well.

I planned things out pretty well and tried to get as much all thought out as I could, but still there were things that went unexpected. Instead of the 2 cars we scheduled, we had 4 showing up. No big deal really, but it wasn't easy when time was limited while we did not want the shoot to go endlessly. And then I struggled a bit with the 2 cameras with me and managing the tripod, while still trying to coordinate the cars and communicate with the owners all at the same time when the primary thing I wanted to do was to shoot. I also made mistakes here and there when I had so many things on my mind, while there were distractions around particularly when there were others driving around the lot being silly... some guy with a modified car was revving his engine being stupid; some other guys drove up to the empty lot with unknown intentions; and later 2 cops also showed up but was being nice and didn't interrupt at all and actually waved at us. I actually felt better that knowing there were law enforcements around... :)

But here are the results... this is particularly the one shot I liked the most. After many, many experimental shots shooting everything, endlessly looking for inspirations from magazines and the Internet, and portraying different angles and scenarios all in my head randomly, I think I'm finally getting to a point where I feel comfortable to proudly call this my work.

Yellow on Black, Audi TT (by hermanau)

Big thanks to all 4 owners who were very cooperative throughout the 3 hour process, putting up with my endless request of moving the cars, turning the wheels, etc. I'm also very glad that everything went under control and everybody was very friendly.

On a side note, I developed some of my pictures at Target and I find the whole service very impressive and easy to use. From my home computer to flickr to picking up at a local Target = 1 hr? AND the quality was better than what we got from Samy's? That's an easy call for me... :) Be sure to try it out flickr users!


on a side note, some of my work of this Audi Shoot is published here on German Car Blog

Thursday, June 21, 2007

HDR WRX STi Wagon (by hermanau)
Shot with Sigma 105mm Macro, Nikon D50

I have a few shots published on flickr from the shoot last week with a few friends of mine. This probably is the last one with my car in the same lot since I think I've gotten enough practice with the place and I'm ready for the real thing. I'm getting more comfortable with my different arsenal of lens and how to get the shots I want. Although I must admit that there are some angles with the wide angle that I still don't feel perfectly comfortable with. Anyway, next week I have my first shoot coming up with some new cars, stay tuned. :)

HDR WRX STi Wagon (by hermanau)
Shot with Tokina 12-24mm wide angle with Nikon D70

This was shot with my wide angle lens on the 20mm end for less distortion. It appears to work pretty well but I still see that slightest distortion that makes me want to try the 24mm end next time. The light that I decided to include when I shot this seem to work pretty well with the HDR effect.

WRX STi wagon (by hermanau)
Shot with Sigma 105mm @ F/5.6 ISO200 with Nikon D50

Thursday, June 07, 2007

Tutorial - Abstract Smoke Art

This has yet been another interesting experiment for me. After all the fruit splashes, I feel much more comfortable working with my flash. With a lot of questions in my mind have been answered with more experience under my belt, I decided to give the smoke shots a try. To my surprise, it's much easier to get good results than I originally anticipated. Here are some of the tips for you if you want to try shooting them at home. :)

Equipment required besides your camera:
  • Tripod (yes, this is a must, no excuse),
  • off camera flash sync. cable,
  • candle holder (or anything you find that holds your candle),
  • lighter (easier to work with than matches),
  • Remote shutter cable, or a IR remote to your camera (come on it's cheap...),
  • Some kind of black backdrop
  • keep water or an extinguisher handy just in case... you're warned :)
With your camera positioned towards the candle or inscent secured on your tabletop, pre focus on the candle, and shoot with a small aperture. Smaller aperture allows you to have a deeper depth of field, and thus have more of the smoke in focus. Set up your flash sync cable with your flash, and set it near the candle on the side, aiming towards where the smoke would be going. Set up your black background behind the entire setup, and position it with a generous distance so that the flash will not light up the backdrop. Turn off all the lights, close your windows, turn off your fan/AC to limit air flow.

The smoke I shoot is simple candle smoke that appears after the candle is put out. I simply blow at the candle to put it out. The color is added on with a simple Photoshop adjustment layer afterwards. It will take you 10 seconds to do a color if you know what you're doing. I'm not going to take your hand and walk you through since it's a little beyond the scope of this tutorial.

Once you have that set up properly, fire a couple test shots first to check the flash output. Pay attention to the background and see if it's pitch black. If your backdrop is catching light, find a way to restrict the flash and direct it to project where you want it to. If you're getting lens flare, chances are your flash is directly shooting at your lens. Find something to block your camera from seeing flash at all, and that would be easily solved.

Try to vary your flash output and ISO to get a balance of the setup. I use ISO 400 and have my SB600 set to -1.0 with F/22 and the smoke exposes perfectly. Once you think you captured enough, simply drop over to your photo editing program and clean up the image a little bit. Sometimes you may see small dust particles or spots, just use a clone tool or a healing brush to take care of it. The white background is achieved simply inverting the picture. Easy enough? Once you get a hang of it, just shoot a ton of them and let your creativity go wild. :)

Be safe, and have fun!

Some more shots I've done, click to enlarge / see more.

Smoke Abstract 1.13 (by hermanau)

Smoke Abstrat 1.10 (by hermanau)

Smoke Abstract, my first attempt (by hermanau)

Smoke Abstract, Rose (by hermanau)

X-Ray of a Dog? (by hermanau)

Monday, June 04, 2007

Transparency and Reflections


Transparency and Reflections, originally uploaded by hermanau.

The side entrance of Disney Concert Hall, Los Angeles. On a hot sunny day, my friend and I were shooting the famous Disney Concert Hall, which is a hot spot for architectural photography. Not sure if anybody has shot ths angle before, but I'm definitely falling in love with my 12-24mm and it's distortions :)

Note to self: HDR works extraordinarily on reflective materials like metal, glass, etc; and also textured materials like concrete walls. Use it to your advantage. :)

Tuesday, May 22, 2007

Boost! In car action shot


Boost!, originally uploaded by hermanau.

Trying a slightly different approach today attempting to actually take this shot during the day. I figure I need about 1" shutter speed to capture enough sense of motion, OR I'll have to travel so damn fast that I might get myself killed. FYI I ended up going for the former route.

Last night I tried using my birthday gift (thanks guys!) Gorilla SLR Pod to mount the camera onto the passenger seat head rest. It worked pretty well, but there's still a significant camera shake thanks to my stupid racing suspension and horrible LA roads.


BMW in motion (by hermanau)

Settings: F/22, 1" shutter speed in the afternoon is still way way way over exposed to about 5 to 6 stops. I'll leave that to you to figure out how to get this done so that I don't ruin the fun part for you. This time I actually mounted my entire ebay Amvona tripod in my car with 2 legs extending all the way to the back of the front seats, and the rear leg opening at a wider angle pushing against the rear seats to lock the tripod into place. All the shots were taken with a tiny infrared remote in my hand so that I can concentrate on driving instead of taking pictures.

Disclaimer: ATTEMPT THIS AT YOUR OWN RISK. SAFETY FIRST, AND PLEASE KEEP YOUR EYES AND HAND(S) ON THE STEERING.

Sunday, May 20, 2007

The death of Sportsmanship

Yep, it's dead. Sportsmanship has probably been dead for a long time in this country. It has become very obvious when the penalties were announced for Robert Horry of the San Antonio Spurs, Amare Stoudamire and Boris Diaw after game 4 of the NBA Western Conference Semi-Finals.

I've always been a believer that sports is a form of fair competition where people can play against one another in a fair manner where rules and officiation. Unlike what we encounter in life which isn't always "fair", we all find a way out and see athletes compete fairly while we can enjoy the excitement. The series has been a very physical one, and the referees are supposed to be the ones drawing lines of what is and what is not a foul in order to keep the games in check. Some may disagree with me, but I honestly do not enjoy seeing players going down hard every single time they make a layup. Every time you fall down like that, you risk injuring yourself, and for those athletes that may lead to career ending injuries. In this series particularly, I honestly don't remember an "unchallenged layup" where players can come down without getting the physical treatment. The stakes are high, and the players and fans all know that it may very well be the series to determine the championship team of this year.


Game 4 in final seconds, the Suns were on its way to winning it in the final seconds. The Spurs had no chance to even tie the game, and the questionable foul happened when Robert Horry hard fouling Steve Nash lacking any sportsmanship of any kind to protect him from injuring. Instead of just a regular foul, it appeared that he basically tried to knock him down hard to cause injuries to the Suns' MVP star player. Usually, a player commiting a foul to a running player on a fast break situation would be to wrap him around to stop him from continuing to run in a way that he would not fall down hard to risk any injuries. Instead, as you can see from the video, Robert did it exactly the other way around.

The aftermath of all that:
Robert Horry the bench player who committed the horrific foul: 2 game suspension
Amare Stoudamire (The Suns' Star player), Boris Diaw (The Suns' starting Foward): 1 game suspension each in the determining game 5 of the 7 game series for simply leaving the bench area that caused... nothing.
The TEAM with the player that caused the flagrant foul lost a bench player for 2 games.
The TEAM that had the MVP knocked down almost knocking his head to the officiating tables lost 2 starters for the decisive game 5, and eventually losing the entire series.

The reasoning:
NBA has a rule stating that if the players on the bench leaves the bench area, they will be penalized. Honestly, the rule itself isn't a bad one. It's designed to keep the players in check; the game undisturbed; and in a sense that incidents like these will not escalate.

Fairness? None...
The rule was made in order to keep the game to be played fairly, correct? It's just like our laws were made in order with justice and fairness in mind, except it applies to the game instead of our lives. What happened to the justice and fairness that we were hoping for in watching sports games? Do we live in the age where sports is more of a form of business instead of competition?
Stu Jackson's decision to suspend Amare Stoudemire and Boris Diaw for leaving the bench during the fracas at the end of Game 4 is utterly, profoundly, alarmingly, unreasonably ridiculous, writes Chris Sheridan. -ESPN
I think Stu Jackson and the NBA has lost something that used to capture the hearts of basketball fans, and it spells S P O R T S M A N S H I P.

"The rule is the rule," Jackson said.
"It's not a matter of fairness. It's a matter of correctness."

What if that's what a Federal judge say to you in your face where your fate is determined?
It's about correctness of applying a rule that is designed in a world of sports where fairness stand by some guy's biased interpretation of it?

There is no doubt that the Spurs/Suns series is already ruined by the call, and there is little doubt that the NBA playoffs season is ruined by this one misjudgment.


Fouls like these are OKAY, and it's already become a part of the game that even players like Bruce Bowen who kept crossing and pushing the line are rewarded with Defensive Player of the Year, TWICE.

IF, and I repeat, IF the Spurs ordered Robert Horry to intentionally make a hard foul on Nash and walk back immediate to cause this mayhem, then what? I mean, I am by no means making an accusation, but let's just assume for a second that is actually a remote possibility... then the NBA just got lured into making a call to just ruin the entire season of eliminating the Suns to compete fairly to the end of the season. If I am the coach of the Spurs in that situation, presumably knowing the outcome of all this, would you have done it?

The NBA needs to review these rules. The NBA needs to look at a bigger picture on the scale of a team instead of just a player in situations like these. The NBA should also look into promoting sportsmanship and fairness, instead of abiding by the books. The season for me, is already over, and I have lost any further interest in watching it any further regardless of how much I enjoyed the Golden States Warriors vs the Dallas Mavericks series. I can't help but still remain a bit of hope, because I still fantasize what sports should be all about.

Interesting fact: NBA commissioner David Stern has canceled a schedule appearance in Phoenix for Wednesday night's Game 5.


Saturday, May 19, 2007

Subaru Impreza WRX


Subaru Impreza WRX, originally uploaded by hermanau.

rmed with the proper tools, I went back to my favorite HDR location last night hopefully to get a little inspiration. Knowing the right spots this time, I got lazy and stopped exploring and started exploiting my favorite spot with my dirty car.

It took me a while and 2 attempts to get the post processing of this to look the way I anticipated. Although this may still not be perfect, but it made to my personal favorite HDR shot I've made so far. It took me a while to get the color to look right fumbling with my D70 at night (even after the fact that I snapped 10 shots to try to get the color balance right, it still came out to be off), but then I think the effort is worth it.

Featuring my Subaru WRX wagon that has a long list of modifications that I'm sure you don't know to know. :-)

Tuesday, May 15, 2007

Robert Horry Foul On Nash

What do you know... the Spurs just keep living up to the "dirty team" name Amare called them. Robert "Big Shot" Horry landed a cheap shot on Steve Nash last night in game 4. Robert, word of advice for you here: "learn better from master Bowen". At least the dirtiest player in the NBA Bruce Bowen does it with some subtlety.

Friday, May 11, 2007

Baron Davis DUNK over Andrei Kirilenko

OMG OMG OMG... Game 3 2nd round playoffs Golden State Warriors against Utah Jazz. I think this guy Baron Davis is turning everybody who watches his play into his fans. BARON! BARON! BARON! BARON! BARON!

Thursday, May 10, 2007

Bruce Bowen's "Champion Defense"

If a picture is worth a thousand words, then a youtube video is worth 10,000,000 words. Bruce Bowen is known to be a tough defender, and also a dirty player to some. You be the judge... and be sure to check out the other Bowen videos when u're done with this one.

Choose a Vista

Apple rolled out a few new commercials and I love this the most. As a PC guy, I really hate the new different versions of Vista to death. It's just way beyond software and OS, and simply a stupid shallow crooked marketing move. Kudos Apple, haha! :)

Wednesday, May 09, 2007

Steampunk Keyboard

I'm sure I'm not the first one to blog this, but this keyboard "mod" is way beyond crazy... It reminds me of all those Sherlock Homles games I played... If computers were invented back in those days, I'm sure this is how the keyboard would have looked like. :) If not mistaken, the original modder Jake Von Slatt at Steampunk is actually willing to make these if the price is right. Wish you the best of luck, Jake! Nice work!

Friday, May 04, 2007

Upcoming BMW 1 Series

All I can is WOW... BMW is seriously redefining the art of consumer level automotive design. I don't entirely love every part of the car, but just try to get a pencil and trace the lines of the car and see how much work and attention to details they put into their craftsmanship and design work... I especially love the height of the trunk that they seem to be trying to go back to design/looks > trunk volume, or they figured out a better way to hide the big trunk and manage to keep a better looking trunk shape without hindering the rear view. Also notice the extremely small overhang in the front and how the front of the bumper and hood cuts off beautifully from this angle. Argh... why aren't they selling the 1-series in the US...? :-)

Golden State Warriors made History!

Tonight, Baron Davis, Stephen Jackson, Jason Richardson, and the entire Golden State Warriors (42-40) led by Don Nelson made history by defeating the #1 seed Dallas Mavericks (67-15) in the first round in game 6 winning the series 4-2. This is first time a #8 seed beating a #1 seed ever since the NBA changed to 7game/series in all rounds, and probably one of the biggest upset in NBA playoffs history.

After blowing a 2 digit lead in the final minutes in game 5, the Warriors bounced back to seal the deal by winning a whopping 25 points. It's a complete team effort and faith that the warriors put in that captured the hearts of all the fans. The Warriors, towards the end of the season, secured their final #8 playoffs spot by winning 8 out of 9 games losing only to the Spurs, including a defeat to the Mavericks at 4/18. The irony is if the Mavs played all their starters in that game to actually try to win it, they probably would have faced the Clippers instead and cruised by round 1 with ease.
And of course, big props to Don Nelson who truly believed that they had a chance to win, and coached the team to win the series. I still remember the days when I first moved to the bay area watching the Warriors and started watching NBA and learned what basketball was. It wasn't until later til I learned how Nellie coached the Sprewell, Harderway, Mullin 3 guard formation to success.
Keep it up GSW! Wish you guys the best of luck in the next round(s)! :-)

*Photo by Rocky Widner/NBAE via Getty Images, copyright NBAE

Thursday, May 03, 2007

Opanda iExif Viewer 2

This nifty little FREE program is a Firefox / Flock script that allows you to view the Exif data of the pictures inside your browser. Quite a convinent tool to let you understand better how the shots you like are taken. :-) Enjoy!

Note: They also have an iExifPro version that includes even more features at $19.99.

http://www.opanda.com/en/iexif/iexif_firefox.htm

General Motors Corp.'s first-quarter profit fell 90 percent compared with a year ago, citing losses in the home lending operations of its former financial arm.

It was the second consecutive quarterly profit for the nation's largest automaker, which said in Thursday's report it had record vehicle sales worldwide and improvements in its automotive operations in the latest quarter.

But the profit of $62 million, or 11 cents a share, for the January-March period was down from $602 million, or $1.06 per share, a year ago.

Its earnings excluding one-time items fell short of Wall Street expectations and its shares fell nearly 4 percent in midday trading.

The company attributed the year-over-year decline to losses in the residential mortgage business of GMAC Financial Services. GM sold a 51 percent stake in GMAC to private equity investors last year, but still owns a 49 percent stake in the business.


Source: http://news.yahoo.com/s/ap/20070503/ap_on_bi_ge/earns_gm

Wow... how do you drop your quarterly profit by 90% comparing to the previous year and still stay in business? *hats off* The American automotive never fail to impress me with their creativity and ability to defy logic and "mysteriously" stay alive. Since I'm always so negative about everything and able to point out the most obvious flaws common people seem to ignore, let me be the 349749393th person to say this: You're only your own victim of trying to sell crappy products using the American brand! You're running a business based on numbers instead of proudly making a product with passion! It's the year 2007 and we're talking about Global economy here, and the rest of the world out there does not buy your crappy products just because it's American made!


Nikon D50 vs D70

I picked up a Nikon D70 a while ago from Patrick through a friend of mine at a discounted price (thanks Patrick!). I've been using it for a little while now and I feel comfortable enough to start writing about the differences. I'm sure you'll find a lot of articles comparing the specs on the Internet, but let me be honest and say that most of them are not useful. Why? Because they're not highlighting the most important differences! Let me skip past the specs comparison and get to the point, and hopefully help those who are choosing between the two cameras from the used DSLR market.
CameraD50D70
Depth of Field Previewn/adedicated button
External Flash Commander moden/a, you can use a flash sync cable, but you cannot mount it onto the stand with the cable attachedbuilt-in
Dial Controls1 (camera offers less features accessed thruough shortcut keys)2 (camera offers more features for quick access, but also prone to accidental changes due to that)
Sensor6.1 Megapixel, slightly less noisy at high ISO than the D706.1 Megapixel, images tend to be on the blue side (WB compensation available through camera function)
LCD2.0 inches1.8 inches, preview feature is not as user friendly also
Top LCD information panelNO LED (yikes!!!)LED lit, dedicated button to turn on/off
ISO4 settings from 200 - 16009 settings from 200 - 1600
Overall builtsolidslightly better built than the D50, also a bit bigger

Wednesday, May 02, 2007

Strawberry Drop


Strawberry Drop, originally uploaded by hermanau.

My first attempt to this type of shot. This is far from perfect, and I honestly don't have the setup exactly the way I wanted. Hopefully next time I'll get my hands on a tank instead of having to use the vase and deal with the annoying reflection. This shot was made with the on camera flash and a SB600 external speedlight mounted on my 2nd tripod, and my D70 set to flash commander mode with the pop-up flash.

Sunday, April 29, 2007

Peacock


Peacock, originally uploaded by hermanau.

I went to the Arcadia Arboretum with Bernard on Saturday. It's such a beautiful place, way better than that garden we visited last week. There are birds roaming around everywhere, a well kept green house, although the waterfall was turned off... But it really paid off when we spotted this peacock fanning its plumage for us. It was really quite a show of this one of nature's most fascinating beautiful bird.

Tuesday, April 24, 2007

1000+ Views, 100+ Faves!


Endless Tranqulity, originally uploaded by hermanau.

My first ever 1000+ views 100+ favorites shot... :-) This shot really kinda surprised me when I developed it from the NEF file 'cause it almost came out like this exactly. I didn't add any colors to it whatsoever. The only thing I did to it was sharpening, contrast, and noise reduction. Thank you for all the support, and hopefully I'll have a 2nd shot that reaches this benchmark soon. :-)

Waterfall


Untitled, originally uploaded by hermanau.

My first waterfall shot ever. I've always wanted to shoot these, but I never come across one. This one wasn't shot in the ideal angle 'cause the plants were in the way, and also I didn't have my tripod with me. This one was shot at F/22 with a polarizer 1/3sec shutter, and holding the camera resting it against some hand rails. This really isn't the best, but I guess not too bad for the first time. :-)

Friday, April 20, 2007

FixNEF, yes seriously, Fix your NEF!

Huge props to Jaewook Chung writing both programs... this one is probably even better than PreviewExtractor of the previous post. Wow, even taken those pictures that the WB is so messed up that you would have to spend an hour in PS just trying to correct it and eventually fail? Now this tool is here to the rescue... It appears to have a smarter algorithm in correcting white balance, and it modifies your NEF (RAW) file so that you wouldn't have to deal with jpeg loss. The only downside to it? You need Nikon Capture to use in conjunction with it in order to obtain the values you need. Also, too bad it doesn't support my old D50... :P D70, D2X owners, whee! Download the tool here.

Shutter Count - Nikon

Most of you should already know that the life of your DSLR is closely tied to the shutter count. Although there hasn't been any confirmed number of counts on how many times a shutter would fail, but it should give you an idea what the "mileage" is on your camera. It's especially helpful if you were to purchase a pre-owned unit.

I came across this one today for Nikon and I find it doing just that... the shutter count on my D50 actually surprised me at 8367. The D70 I just purchased from a friend is sitting at 7373. On top of that neat feature, it also extracts the largest Jpeg file from your NEF files, and it supports batch operation! Wow! Anyway, here's the link to download yours. :)

Monday, April 16, 2007

Bugeye WRX Wagon


02 Subaru Impreza WRX, originally uploaded by hermanau.

Alright, I'm trying some a little different on this shot. I actually took 7 shots of different exposure on this but I only used 4 of them. Instead of using a wide range of exposure to get a perfectly exposed shot all over, I actually managed to control the "feel" of the image and re-create the lighting environment, but dramatically enhance the feel of it to create this surreal dramatic lighted parking lot look. I actually like this shot the most out of all the HDRs I've made so far. It looks HDR'ish, but you'll question your eyes, and the lines that are usually quite subtle on the car is showing themselves with pride. :")

Friday, April 13, 2007

Tutorial: Adobe Photoshop basics - Levels

I browse about 100-400 pictures / day on flickr, and I notice a lot of pictures out there are underexposed or overexposed. The truth is, if a picture is overexposed, there really isn't much you can do to save it; but if it's underexposed, you have a pretty good chance of saving it. To understand this, you have to understand how your digital sensor works. It works much like film in this case: When there's too much light exposed to your sensor for too long, it exceeds its capability to pick up any color information, and as a result, it turns into 100% white. We call that a blown-out spot. There are times when it is intentional to leave some spots blown-out in order to allow proper exposure to happen in other areas in a picture, but in general it is not desirable. If you shoot in RAW format, you still have a chance to adjust it when you process the picture. But before I lose you, let's go back to the subject and talk about underexposure.

Below is a typical underexposed picture, but not by far. It's not a subjective thing, but is actually factual that you can see from the levels histogram as shown below:

teeth_blownout
Notice the histogram does not stretch all the way to the end, but rather lies from left to right about 65% of the way. In order to fix this and properly expose this picture, you should theoretically slide the right arrow to the end of the histogram, thus telling your photo editing program that the brightest spot of the picture is... right there (where the red arrow shows). Let's put it in a different way so you understand this better: You're basically telling the program that you want to discard anything on the right of the histogram, in this case almost nothing, and use where that arrow points as the brightest spot in the picture.

Before we move on, look at the picture once again, and notice the teeth of the beautiful lady in the picture is unfortunately blown-out! Right... you just told the picture to set the brightest spot, and hey Herman you messed up the picture! Ahem... that's why I said theoretically earlier! In most cases you should do that, but in this image, nope! The image was shot with a pretty strong light source somewhat facing the lady's face, and her teeth unfortunately caught more light than the rest of the face, and it became the brightest spot in the image. Sure there are a lot of ways to fix this, but let's stay with the basics this time. What we're going to do here is to ease up the earlier adjustment to what's shown below:

teech_okay (by hermanau)

Ahha! better... the face looks more natural, although not perfectly exposed. Now that you know that you have definitely improved the image, but not exposed it perfectly just yet. We're going to try the curves tool to bring up a little bit more light around the mid-tones, while leaving the brightest spots (the teeth, for example) alone. Look at the image below again:

curves_all (by hermanau)

Yay it's coming along... but it looks too bright again, particularly in the facial area. Correct, and this is how we're going to fix this final part of the image. We're going to tell the program that we want this effect that we just did, but only apply it fully at the bottom of the screen, and gradually blend into almost no adjustment towards the top of the head, in a sense that the face wouldn't catch too much of the ill-effect we just did. What we'll do is to click on the mask of the adjustment layer we just did, and draw a gradient from lower right to upper left in white to black seen below:

curves_masked (by hermanau)

Tada! That's it and we're done! Before you quickly save it and upload it to flickr, please listen to me before you wrap it up. Remember you're trying to enhance the image, not alter it dramatically here. Your adjustments MUST be gradual in order to maintain subtleness. Remember you don't want to be seen over-adjusting, and you want to always go back and forth to compare the before and after picture and see if you really improved it, or if you actually made it worse! Here's a quick comparison of the before and after shot.

Emile (by .Hortencia.Caires.)finished (by hermanau)

Recap: We used the levels tool to better expose the shot, then we used the curves tool to bring out the mid-tones, and finally used a layer mask to mask off some of the effects of the curves tool to avoid making the face too bright. Questions, suggestions, feel free to exercise your freedom of speech! ;-)


Credits: Big thanks to .Hortencia.Caires. on Flickr for allowing me to use her beautiful picture as an example here!

Additional notes: A reader asked me to explain further about the histogram on Efania and I decided to post it here too:


I'm glad you asked because I was afraid I'll lose most readers if I explained too much in depth. The x-axis of the histogram represents from left to right, complete darkness to complete brightness. The y-axis represents the amount of pixels. in this example it's showing RGB meaning Red/Green/Blue channel, but since this is a b/w image it's only representing luminance, or the amount of light.

histogram (by hermanau)

In this above example, translating into plain English:
There's a lot of complete darkness, mostly in her clothings in the lower right of the full image, some in the hair. At around 25% to 50% of the x-axis we've got quite a bit of information too, representing the darker gray tones of the picture: part of her face, her arms, the background; the rest of the information from 50% to 75% or so which has only quite a few pixels the bright part of her face; and finally there are no pixels from 75%-100% brightness int he image, meaning it's under exposed. But in reality, since we want to avoid properly exposing the entire image resulting in the teeth overexposing, we resorted to using the curves and a layer mask to selectively bring out more details of the significant part of the image and leaving the original feel of lighting intact.

Hope I explained this better this time... :-)

Afterwods: If I were adjusting this image myself, I would probably try to isolate the teeth and part of her forehead using a layer mask made in combination of magic wand, gaussian blur, paint brush / quick mask to make it closer to perfect. But we'll probably save it for later... :-)

Paint.NET, a free alternative to Adobe Photoshop

I've been flickr'ing too much lately, and started coming across a lot of pictures that are underexposed. We live in a digital world, and underexposed pictures can be saved a lot of times. Although the vast majority of people out there who owns a digital camera, only a hand full of them own Photoshop or have enough knowledge to use it to their advantage. I came across a so-called alternative recently called Paint.NET. It's a free image editing program and photo manipulation program that contains much of the core features you need for easy adjustments, and all those tools that are better than your silly MS Paint that belongs to the museum.

I was going to start writing some of my tutorials about fixing photos with common problems based on it, but after spending some time with it... I find it missing way too much features even the earlier versions of Adobe Photoshop offers. Honestly, I can't live without things like layer masks... transparency, different brushes and pressure... but then again, to be honestly with you, it's a pretty darn good program if you're looking for something FREE to replace your MS Paint. :-) Give it a shot if you don't have Photoshop or similar programs!

Thursday, April 12, 2007

BMW 330i


Shirley's BMW 330i, originally uploaded by hermanau.

Alone in the parking lot

My 2nd HDR attempt. This time I talked to my friend to get his advice to clean up most of the distracting visual elements before uploading the final version. I'm confident that this is really really close to getting my HDR the right feel. I don't want my HDRs to scream out loud that they're HDR and want attention. I want to stay low right below the line where people will notice it's HDR... so here you go ;-)

Wednesday, April 11, 2007

Nikon 55-200 mm F/4 5.6G ED-IF AF-S DX VR Zoom-Nikkor Lens w/ Vibration Reduction

I don't know how I missed this one when it was released in March, 2007... but I just got to post it for those who are slow to react like myself... 2 words: GET IT!!!!!!

This is the very first VR lens ever priced at the budget consumer's level. I thought it was April's Fool, but no it's seriously priced at $249.99! Expect plastic construction all over like the Nikkor kit lens, but I'm pretty sure you'll find the Nikon quality and the VR-II technology will definitely be worth it. I guess I'll have to postpone my plans on my ultra-wide angle lens again... :-)

Found it at wolfe's camera right here... gosh why am I not getting commission?
Nikon's website about the lens

HDR Tutorial with Photomatix and Photoshop

Forewords: I hated HDR. Why am I even bothering with it and writing this? It's only because there are too many that really give HDR a bad name, and I finally got around and decided to learn how to do it well myself. I'm not claiming to be an expert in this and I'm only sharing what I've learned so far.

Preparation: First off, you need an HDR software to make HDR shots. There are lots of HDR softwares out there on the market, and Photomatix is a popular choice and is what I used in mine. I believe Photoshop CS and above has the HDR feature if you already have a copy. Second of all, you need a tripod. This is very important because in order to generate a good HDR you'll need multiple shots of different exposure. You can generate HDR with 1 picture, but you wouldn't get a very good one and take the most advantage of it.

Before you start, you may consider briefly reading what HDR is really all about, what the results should look like, and what you want to achieve before you proceed. Here's a pretty good site for your reference: Cambridge in Colour


Step 1: Taking the shot:
First off, identify your subject. Find something with a wide variety of range in lighting. e.g. sunset silhouette; shooting from inside a building with windows in the middle of the day; parking lot at night. Also, make sure you find something that stays still and does not move. Set up your tripod, and then you'll be off to take multiple images. You can either use the bracketing feature of your camera, and if it's not available, manually take multiple shots of the same white balance, aperture, but vary the exposure. I did mine using different shutter speed in Manual mode shown above.

multi_exposures

Take at least 3 shots, and review your shots. For best results, make sure your different shots cover a wide range of exposure of different parts of the picture.

Step 2: HDR processing:
This tutorial is not meant to give you a step by step tutorial on how to use your HDR software, and thus I'll try to cover the broader basics of what you'll encounter and prepare you with the information you need to get it done.

Open up your HDR software, and use it to open up all the images you have taken. Follow the instructions and start generating your HDR! (For Photomatix users, Click HDRI, -> Generate HDR).
When you're done, you'll see something like the following picture, YUCK!
tone_mapping (by hermanau)

Don't be discouraged yet like I was... :-) We're just beginning and this is only a part of the process. Review the image, and check for ghosting effects or visual blemishes. If you spot ghosting, chances are your camera moved when you're shooting, or your shots need to be aligned. In that case, you may have to go back to step 1 or try the aligning image feature of your software if it's available.

Step 3: Tone Mapping:
In Photomatix you'll see that little window hovering, and that's a preview window of what it could look like when you adjust it properly. The large preview window is only giving you an idea of the range of the image, and by no means it is going to be the final product. Then, go to HDRI -> Tone Mapping and adjust the settings to your preference. Experiment with the settings to your liking, but make sure you don't go too extreme here. You want to enhance the picture instead of generating a plastic wrapped 3D'ish looking piece of duno-what-you-call-it like a lot of those HDR-wannabes out there. This is where I can't really share much with you at this point because I'm not exactly an expert. But I'm sure you'll find a ton of reference out there that will assist you in this process. This is a process with many different approaches, and you'll have to master this if you ever wanted to get your HDRs right.

When you're done in this step, you'll be having an HDR image (yay!), but we're not done yet (duh!). Think of it this way, your HDR is like a RAW file that contains much more information about each pixel than necessary to dispaly on your monitor. Why? That's because when you're done, you'll be converting this 24-bit or even 48-bit HDR image back into an 8-bit LDR format, discarding the unused information. Save your image in 48-bit format to retain all the information you have created in the process in TIFF.

If you're a Photoshop user, you may skip the tone mapping in your HDR software and covert the HDR image into LDR in here. In that case, you'll notice a lot of tools normally available to you in Photoshop or the photo editor of your choice are missing when you open the 48-bit TIFF. You'll have to change it back to an 8-bit or 16-bit image before you can regain all the tools.

This is the step a lot of people skip, and fail miserably in their HDR resulting in a flat, overexposed, plastic wrapped like image. I can't stress enough in my tutorials about this, but remember you're trying to enhance the image instead of trying to create something from scratch when you retouch an image. HDR is no different from any photo retouching process, and could be very destructive if you go overboard.

Step 4: Post Processing:
Now, open up your newly generated HDR image with your editor (Photoshop, in my example). What I tried to do here with my image is to #1 reduce the color over saturation, #2 bring back some of the contrast lost in the process. See the image below:

photoshop_editing (by hermanau)

I've applied Levels to first correctly expose the image, stretching the sliders on both ends to the histogram. Then I applied 2 different curves to the image to adjust the contrast of the image, and to bring out the details I wanted. Finally, adjusted the saturation down by a lot, yes a LOT... saturation makes beautiful colors, but over saturation results in loss of range of color and can be very destructive also. The results... you be the judge. :-)

Subaru WRX (by hermanau)
Final Result


Subaru Impreza WRX (by hermanau)
Another recent shot... Better looking? ;")


Finally, I have a few tip for you all if you are new to making better HDR shots:

  1. An masterfully processed HDR shot would be a piece of crap if the shot itself is bad. Keep that in mind and watch your composition, focus, sharpness, noise, angle, etc.
  2. Know what HDR does for you, and use it to your advantage; not to your disadvantage. HDR stands for high dynamic range, and it's basically stacking the same image of different exposures in order to better achieve the ideal exposure that cannot be captured in one single shot. Before you run outside holding your camera, think in your head what would be underexposed and overexposed if you shoot there, that time of the day. There are good times, locations, and lighting environment where HDR truly shines.
  3. Bright daylight where pretty much everything in your frame other than your wheels and your undercarriage is brightly lit has minimal for you to enhance.
    tip: Night shots with multiple light source results in amazing results if done right.
  4. Shoot RAW. Don't argue with this one... just do it.
  5. Shoot with a tripod, always. If you're serious about photography, invest in a better tripod and spend at least $150 or more for a decent one.
  6. Color balance is extremely important in HDR. Make sure you don't end up with multiple shots of different color balance and end up with a weird image.
  7. Shooting the image, combining them in PS/Photomatix, etc, and Tone Mapping is only HALF WAY OF THE PROCESS! I'M SERIOUS. You should spend at least the equal amount of time or MORE in post processing to finish editing the image. The unbelievably great looking HDR images you see do not come out straight from just Tone Mapping.
  8. Last but not least, always go back and compare it with the original shot, and I mean it. The HDR process is not supposed to create a silly halo effect that looks plastic paint. It's a treatment to achieve the ultimate surreal exposure that not even our amazing human eyes could do. Make sure your treatment and post processing is doing something constructive, instead of making it worse than it originally looked before the process.
Hope it helps.

BMW 335i Convertible (by hermanau)

Denim Blue Audi TT Coupe (by hermanau)

HDR WRX STi Wagon (by hermanau)

Tuesday, April 10, 2007

My first HDR


Subaru WRX, originally uploaded by hermanau.

Finally got around to get my first ever successful HDR shot. I stopped by the parking lot of a close by theatre at night a couple days ago and took a series of shots including this one which I got 4 exposures. I've been trying different HDR techniques and failed miserably using Photoshop to create this type of shots. This time I read an article explaining the process in depth and clearly showed why the shot would turn out to be out of whack during the process. I just kinda closed my eyes and just ran past that obstacle and finally went back to Photoshop to recreate that original type of lighting back into the picture so that it's got a breathe of life instead of looking like a 3D image that looks over exposed. Oh and also the saturation was toned down by about 40!!! Tell me what you think... *smile*

Fun projects with Photography Tutorial

I stumbled across popphoto.com today and found a few interesting tutorial articles teaching how to shoot numerous fun subjects and have tips that will really help amateurs and intermediate photographers who have not been exposed to those areas.

I've picked a few to list here:

Monday, April 09, 2007

Subaru WRX Wagon


Subaru WRX Wagon, originally uploaded by hermanau.

My first night parking lot shot. I've always wanted to try these but I don't have wide angle lens, and so I tried a few with my widest 28mm. That kinda limited myself to what I could shoot, but i'm quite pleased with the results. If you want to attempt this type of shot, make absolutely sure you have at least a half decent tripod, that would save you a world of headaches. If you don't have a remote or shutter cord, you could do what I did using a self timer. I set the timer to 2 seconds so i wouldn't have to keep waiting for 10 seconds for it to shoot.

Sunday, April 08, 2007

Beauty is in the Eye


Beauty is in the Eye, originally uploaded by hermanau.

My very first eye shot. Took me less than 10 tries to get this right. Next time I'll try to get a more interesting subject in the reflection.. :-)

If you're interested in doing a shot like this, here's a brief tutorial to what I've done to get this shot:
  1. Make sure you have a reliable light source at your disposal, I used a SB600 flash to bounce this off of the direction where my model was looking, and that definitely made the reflection bright and clear.
  2. Macro lens or macro extension tube is a must here. A point and shoot camera wouldn't let you get *that* much details and *that* close *that* sharp
  3. Manual focus, yes you need it. To nail it perfectly you may have to try it many times because most of the time autofocus will lock on the eye lashes; try the auto focus to manual focus fine tune technique here.
  4. Trial and error, rinse and repeat until you get it right.
  5. Post-editing is a subjective personal preference here. It really depends on the reflection, color, and it's shot. To me, less is almost always more, and honestly I would probably have prefered a black & white treatment all the way. However, the deep brown color is naturally beautiful like a piece of jewel, and thus I couldn't resist. All I did was masking the b/w layer. That's it!